
Oreo ice cream cake is a delicious dessert that you can make ahead of time. It’s easy to make and a great dessert that can feed a crowd.
Oreo ice cream cake is a great make ahead freezer dessert that can feed a crowd.
I love making this cake for birthdays or holidays because it is so easy to make and I can prep it days in advance.
The best part is it is versatile too and can be adjusted to your individual taste preferences.
Oreo Ice Cream Cake
This delightful dessert combines the rich and chocolatey flavor of Oreo cookies with the creamy and refreshing taste of ice cream.
It’s the perfect treat for any occasion, whether it’s a birthday party, a summer barbecue, or just a craving for something sweet.
Ingredients You Will Need:
To make this heavenly dessert, you will need a few simple ingredients.
First, you will need a package of Oreo cookies. You can use regular Oreo cookies or even try different flavors like golden or mint.
Next, you will need some ice cream – preferably cookies and cream ice cream, but feel free to experiment with different flavors to suit your taste.
Lastly, you will need some whipped cream to add a light and fluffy touch to your cake along with some chocolate syrup.
How To Make Oreo Ice Cream Cake:
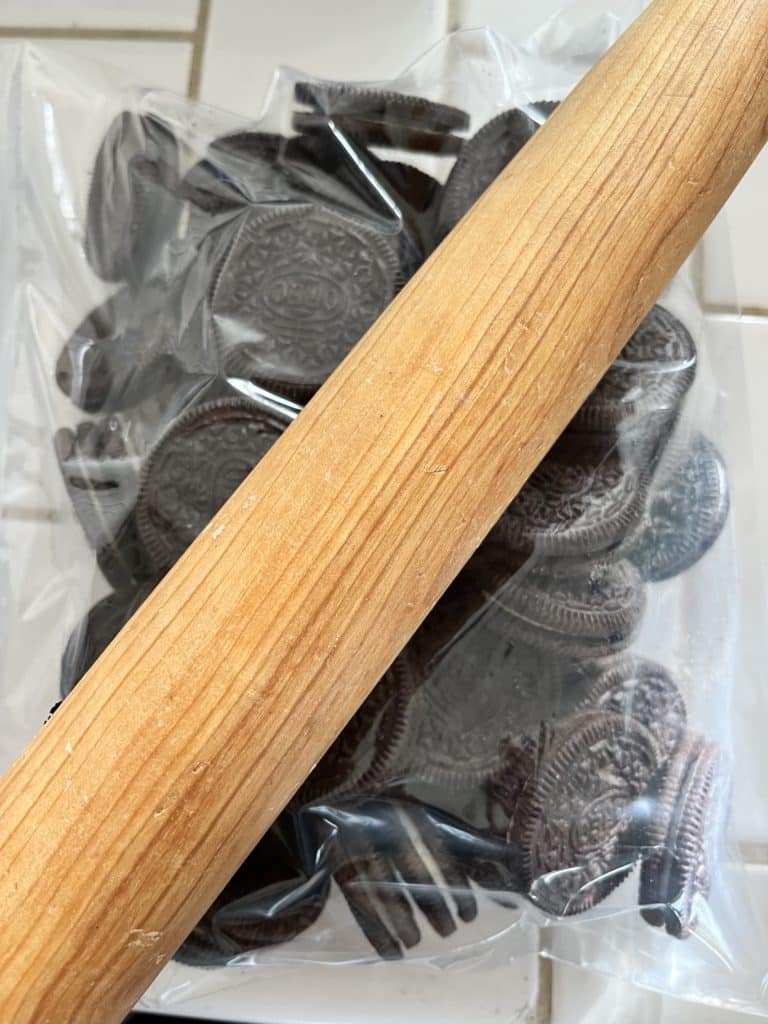
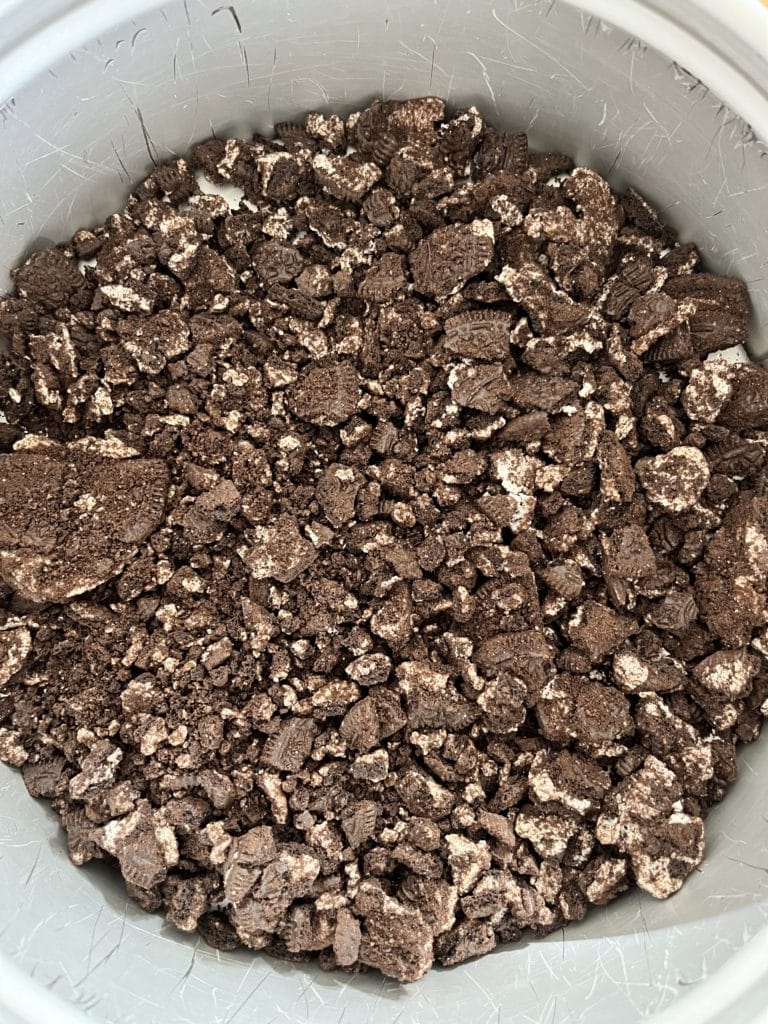
To begin, start by crushing the Oreo cookies. You can either use a food processor or place the cookies in a sealed plastic bag and crush them with a rolling pin. Keep one flat of cookies intact to use as a garnish later.
Once crushed press the crumbs into the bottom of a springform pan.
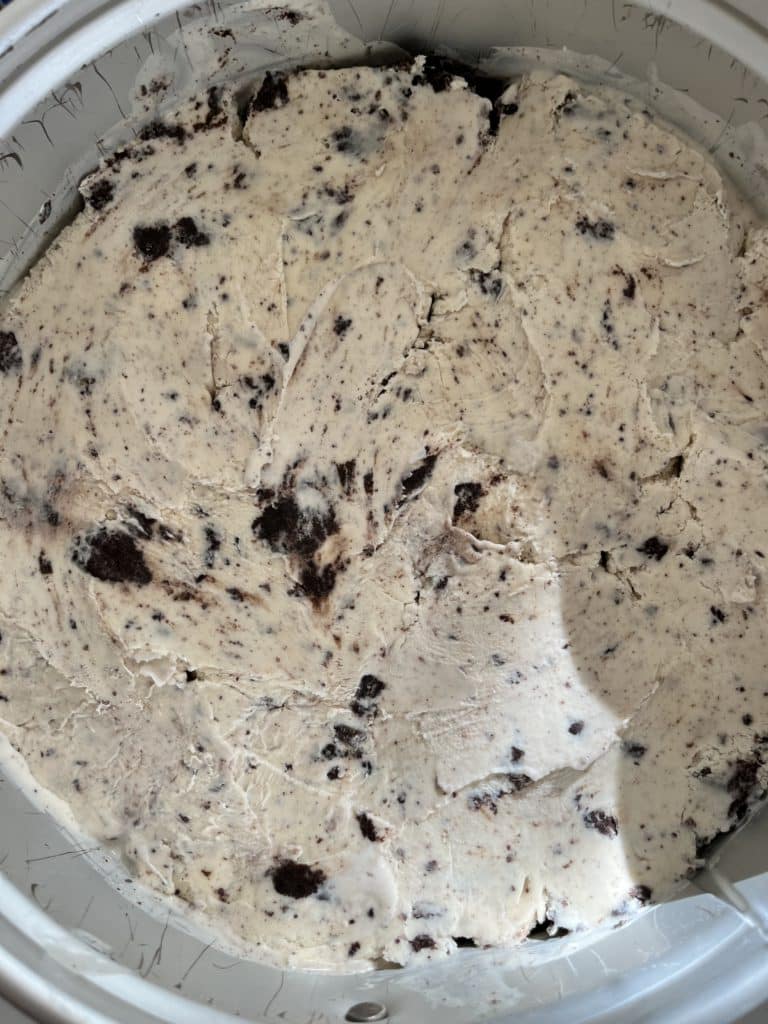
In the meantime, take the ice cream out of the freezer and let it soften slightly. Once soft, spread a layer of ice cream over the Oreo crust.
You can use either one flavor of ice cream or get creative and mix different flavors together. For a cookies and cream theme, use cookies and cream ice cream. If you prefer a more classic combination, reach for vanilla ice cream. You can also do one layer of cookies and cream and one layer of vanilla.
Smooth the top of the ice cream layer using the back of a warm spoon to create a nice even layer.
Then add another layer of crushed Oreos. Sprinkle a generous amount of crushed Oreos over the ice cream, making sure to cover the entire surface. Gently press the cookies into the ice cream to ensure they adhere. This layer will add a wonderful crunch and texture to the center of your cake.
Next, add another layer of ice cream on top of the crushed Oreos, just like you did before. Smooth the surface with a spoon.
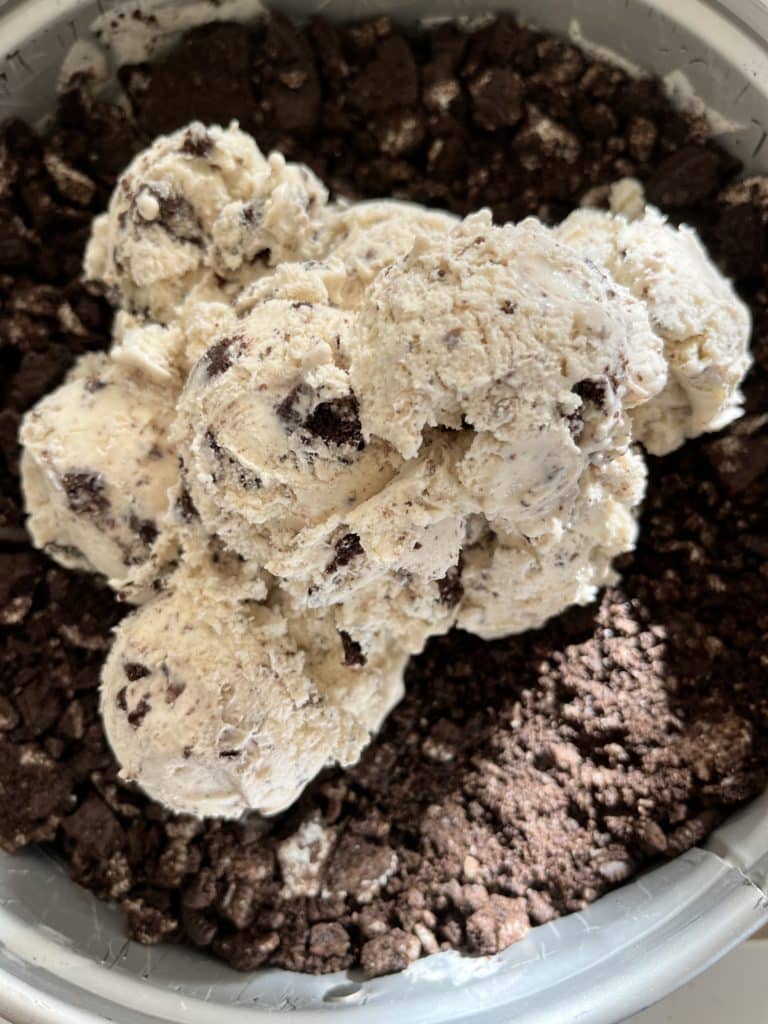
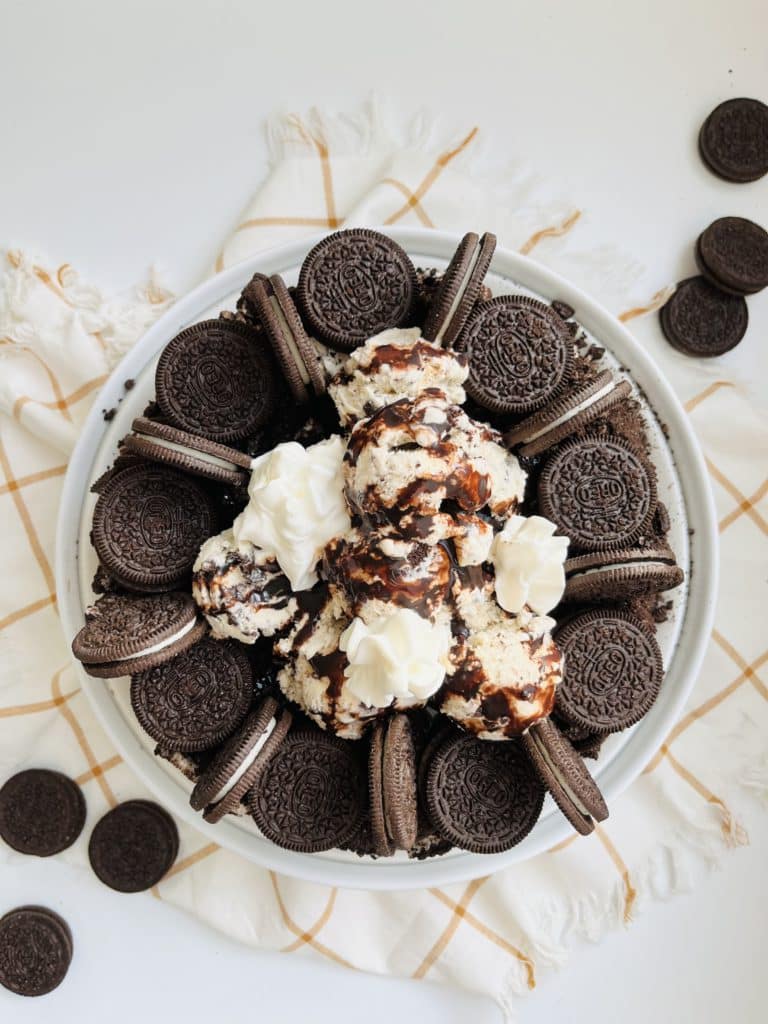
Finally, it’s time to add the finishing touches to your Oreo ice cream cake. Use the remaining ice cream and scoop with an ice cream scoop to create a nice scoop. I like to pile them all in the middle of the cake to add some heigh and dimension.
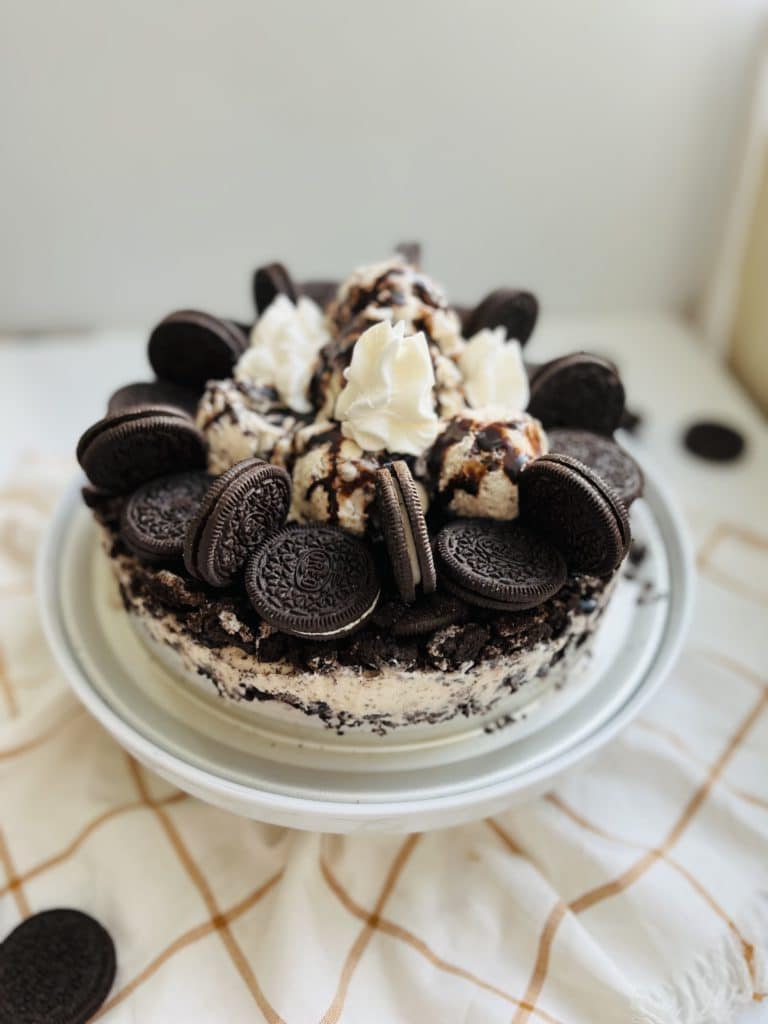
Use the whipped cream to pipe rosettes or any design you desire along the edges of the cake. Take the whole Oreo cookies you set aside earlier and place them on top of the whipped cream rosettes for a stunning garnish.
Store the ice cream cake in the freezer until you are ready to enjoy.
Your Oreo ice cream cake is now ready to be enjoyed! When it’s time to serve remove the outside of the springform pan and slice into the cake and revel in the heavenly combination of creamy ice cream and chocolatey Oreo goodness.
There you have it – a simple and delicious Oreo ice cream cake recipe that is sure to satisfy your sweet tooth.
Whether you’re celebrating a special occasion or simply indulging in a well-deserved treat, this Oreo ice cream cake is the perfect choice.
So gather your ingredients and get ready to impress your family and friends with this delightful dessert that will leave them asking for seconds.
Tips For This Recipe:
Make sure you use a springform pan. A springform pan allows you to easily remove the ice cream cake without it falling apart.
Make sure your ice cream is a little soft. This will allow you to spread the ice cream into one layer.
Place a spoon in a cup of warm water before you spread the ice cream. This will help the ice cream to spread easier.
Make sure you freeze the ice cream cake for at least 3 hours to harden.
How To Store Ice Cream Cake:
You want to store the cake in a freezer. You can make this recipe ahead up to 2 days in advanced.
When you are ready to serve let the cake sit out for a couple of minutes before you remove the springform pan and cut the cake.
Other Ice Cream Cake Recipes:
Valentine’s Day Strawberry Ice Cream Cake
Pumpkin Chocolate Ice Cream Cake
Oreo Ice Cream Cake Recipe:

Oreo Ice Cream Cake Recipe
This delicious oreo ice cream cake is perfect for any occasion.
Ingredients
- 2 (18 ounce) packages Oreo Cookies
- 2 cartons (1.5 Quarts) Cookies and Cream Ice Cream
- Hershey's Syrup
- Whipped Cream
Instructions
- Place the Oreos into a ziplock gallon size bag. Remove the air and seal. Smash with a rolling pin to create small crumbs.
- Place half of the crumbs into the bottom of your springform pan. Spread into an even layer.
- Top with one quart of the cookies and cream ice cream.
- Dip a spoon in hot water and then spread the ice cream into an even layer.
- Then add the remaining crumbs. Spread into an even layer.
- Top with 3/4 of the other quart of ice cream (save the remaining 1/4 for the top of the cake.
- Dip the spoon into hot water and spread the ice cream to create an even layer.
- Scoop the remainin ice cream with an ice cream scoop and place in a mound on the center of the cake.
- Arrange the other pack of oreos around the cake in a decorative design.
- Drizzle the ice cream topping with chocolate sauce and whipped cream.
- Place in the freezer for a minimum of 3 hours or until you are ready to serve.
- When you are ready to serve, run a knife along the inside of the springform pan and remove the outer pan. Slice into 12 slices and enjoy immediately.
Recommended Products
As an Amazon Associate and member of other affiliate programs, I earn from qualifying purchases.


Nutrition Information:
Yield:
12Serving Size:
1Amount Per Serving: Calories: 55Total Fat: 3gSaturated Fat: 2gTrans Fat: 0gUnsaturated Fat: 1gCholesterol: 11mgSodium: 16mgCarbohydrates: 6gFiber: 0gSugar: 5gProtein: 1g